First, this one is not for the faint of heart. Since there was literally nothing online and no instructions included I was really on my own. The concept is simple, it’s a stitched replacement cover for your factory airbag. Execution on the other hand took me a few hours.
View attachment 122027
I won’t go into removing the airbag because there’s no shortage of videos. It’s a pain in the ass but I’ve had it off a few times now and it was definitely the easiest part of this job.
With the airbag out, I started trying to figure out how the hell this all comes apart. Looking at the perimeter of the airbag, you can see metal tabs around the airbag and plastic tabs that hold the cover on.
View attachment 122030
The metal tabs lock the plastic tabs in place. The only way I could work out is that you bend the metal tabs back which allows the plastic tabs to slide over the metal and come off. The metal is quite pliable so a small flathead and some careful bending eventually freed the original cover up.
View attachment 122031
But wait, there’s more! The cover they sent had the standard Ram “bright metal” emblem, not the black chrome. So I had to move the emblem over. It is plastic-welded in, so I used a dremel to grind these green plastic posts flush with the airbag cover and it came right off.
View attachment 122032
To re-install the old badge on the new cover I elected to use CA glue and activator, a product I’ve had great luck with on most of the plastic crap Ram makes. It cures instantly and holds very strong so I don’t anticipate it flying off and hitting me in the face if I wreck. Probably would be the least of my troubles anyway.
View attachment 122033
After the badge was installed, I just had to slide the new cover over the airbag until all the tabs caught, and then bend the tabs back. Reconnect everything and re-install.
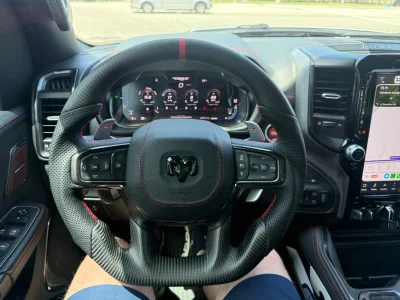
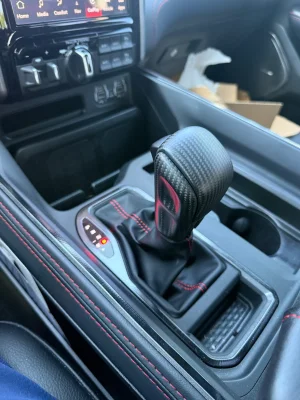
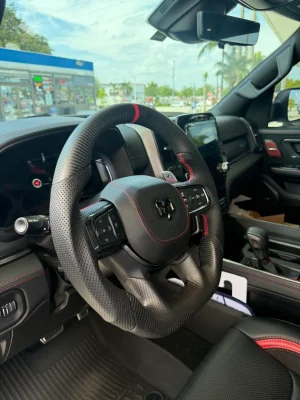
The finished product:
View attachment 122026View attachment 122028View attachment 122029View attachment 122034
Overall it looks great. I requested matching stitching and they nailed it, perfect match. The alcantara also matches the factory stuff perfectly. In the pics the factory alcantara on the wheel is a bit wet from cleaning, but when dry it matched 100%.
I have no issue with the quality or end result, but the install was a bitch, no other way to put it. It’s never comfortable working with airbags, even with the battery disconnected. Even worse when there’s no directions to follow.
Bring your build's interior to the next level with Zencarbonfiber's fully customizable airbag cover, handcrafted to complement your custom carbon fiber or OEM steering wheel. Tailored Craftsmanship: Each airbag cover is hand-rafted with precision and tailored to your exact specifications...

zencarbonfiber.com
If you order one I would suggest you ask them to include the black chrome badge from the start, it’ll save ya some time messing with that at least. So there’s my 2 cents on how I did it and what I think.