-
Featured
- #101
Did you have any words of advice on dealing with that OEM battery box? I'll probably be doing my install this weekend or at least making attempt #1 at it
I hate to even think about having to do it again……
Did you have any words of advice on dealing with that OEM battery box? I'll probably be doing my install this weekend or at least making attempt #1 at it
Sorry to bug you but if you could post these pics when possible, I appreciate it.Oops, I’ll get some posted later today.
I need to find the pictures a customer sent that was a little more detailed but here’sa couple for now.Sorry to bug you but if you could post these pics when possible, I appreciate it.
Thank you sir! Thank helps!!I need to find the pictures a customer sent that was a little more detailed but here’sa couple for now.
how did it go?Did you have any words of advice on dealing with that OEM battery box? I'll probably be doing my install this weekend or at least making attempt #1 at it
I got a laugh out of that at least cause I know how these things can go...good info though so thank you, now I know what the problem looks like. Procrastinating doing this since my truck may not move for some time after I start lolI hate to even think about having to do it again……
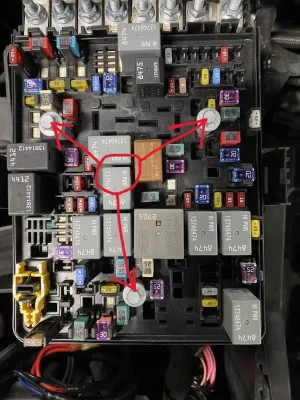
…..my way was probably against the norm, after all the plastic wire harnesses were removed, they are very where along the box, and box unbolted, I couldn’t for the life of me get the box medial enough to get the underside lip along the wheel well free to lift up and out, once the wheel well cover was off you can see there’s a lot of room underneath, I actually ended up lifting the front driver side and pulling the box down and out the wheel well
. Not standard I’m sure, I chucked the box afterwards so if I were to do it again I would probably cut the box or at least cut the lips or edges off wear it’s bolted down so it’s easier to remove. Again not conventional
Yes it does get moved. There should have been an addendum with the instructions telling you how to do it. Basically it gets spaced inboard towards the engine using the supplied aluminum spacers and stainless steel bolts. I'm pretty sure I put them in your box but if you didn't get these, let me know and I will expedite them to you.I received my kit today and will be installing it once my schedule allows it. For those of you that installed and have the Brawler Fab grill lights, I don't see mention in the instructions of the need to move the already re-located washer bottle over where the air tank goes. Does it need to be moved? @Boosted
I’ll check on the bolts as soon as I can to make sure they are in there. I didn’t have the addendum. Sounds like I remove the two existing fasteners , put the spacers between the existing mounting surfaces and the bottle and then just use the longer fasteners supplied?Yes it does get moved. There should have been an addendum with the instructions telling you how to do it. Basically it gets spaced inboard towards the engine using the supplied aluminum spacers and stainless steel bolts. I'm pretty sure I put them in your box but if you didn't get these, let me know and I will expedite them to you.
Yes, there's a little more to it than that but not much. Let me know when you are ready and I will walk you through it.I’ll check on the bolts as soon as I can to make sure they are in there. I didn’t have the addendum. Sounds like I remove the two existing fasteners , put the spacers between the existing mounting surfaces and the bottle and then just use the longer fasteners supplied?
It’s gonna be a while I think before I can get to this job because it’s going to take an extended period of time one day. Any chance you could just email me or text me the the addendum that shows me exactly how to do it?Yes, there's a little more to it than that but not much. Let me know when you are ready and I will walk you through it.
Yup, I'll send it to you later today.... Running around trying to get a truckload of stuff shipped. UPS missed my pickup today. lolIt’s gonna be a while I think before I can get to this job because it’s going to take an extended period of time one day. Any chance you could just email me or text me the the addendum that shows me exactly how to do it?
I have lots of time, no worries at all. Thank you for all you do!!Yup, I'll send it to you later today.... Running around trying to get a truckload of stuff shipped. UPS missed my pickup today. lol
Nice work!Finally got the battery box installed! Couple of points for my install.
1) It would be a difficult job by yourself, I wouldn't want to go through the install without help.
2) Install took about 4 hours which included moving the washer tank.
3) It's nerve racking disconnecting the PCM and connectors in the fuse box
4) If you have Ravelco, that wire loom is kinda in the way of taking the stock battery box out. Took 30min to figure out how to get that box out
5) I forgot to secure the connectors to the PCM before I tried to start the truck. It threw a check engine light that went away after 5 key cycles.
6) No issues with anything after having the battery disconnected for 4 hours. All the Uconnect and seat settings were saved.
View attachment 56538
Thank you Bill for all you do for the TRX community! It's guys like you that develop and produce new products from scratch that makes owning this truck that much more fun! It reminds me of owning my Gen 1 Raptor in 2013 when products and upgrades were first being developed. I think your battery box and fuse box reloction bracket really cleans up the engine bay.Nice work!
Yes, remove the 3 hold down bolts from the top which will release the 3 connectors on the bottom.I’m finally getting around to installing my battery box. Any pointers on the relay and relay mounting box? How the heck do you get the relay box itself out of the way? U do all the connectors on the bottom? If that’s the trick, how do they come off? I’m stuck until I figure this part out.
Well now I’m embarrassed. Simple. I just didn’t pull the bolts back far enough.Yes, remove the 3 hold down bolts from the top which will release the 3 connectors on the bottom.
I thought about cutting it but finally wrestled it out from the top. If you don't have Ravelco, it might be easier to take it out through the wheelwell.Well now I’m embarrassed. Simple. I just didn’t pull the bolts back far enough.
Anyone carefully cut the OEM battery box to get it out? I’m starting to feel like the old days of being horrible at a Rubic Cube.