What did you do to your TRX today?

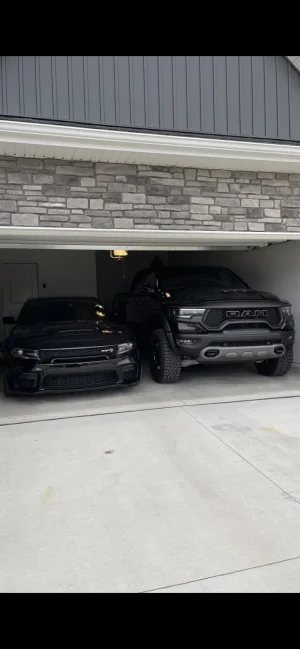
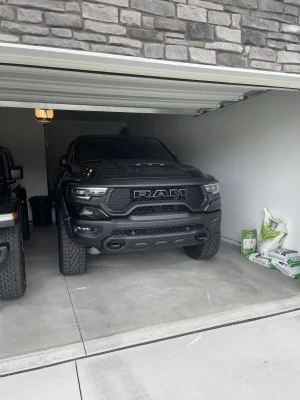
Finally got around to adding a lil white contrast to the RAM on the front and rear 😎
D9282E17-E0CC-4B3C-B123-03BD4532B57C.webp
A9C85837-505C-4B3D-A497-79C7CEBDB757.webp
B2BDB168-6655-416B-B8FD-5E1625DFE6B1.webp
 
Added a Rogue leveling kit and 37 x12.50 Nitto Ridge Grapplers on stock wheels. Very happy with the stance and ride!
I’ve seen several with leveling kits on here, and I do like the look, but yours looks great.
 
Ordered the Weather Tech mudflaps from JustBoltOns on Sunday. They shipped Monday and I got them Tuesday. Kudos to JustBoltOns for the incredible shipping speed. Finally got around to installing them today. Like others have said, be careful when putting them on and tightening up the screws. They screw into plastic so don't over torque them. I snugged mine down and hope they hold up the 118MPH top speed :LOL:
 
I forgot to mention I installed the Oracle light bar on the front bumper. Very easy and the video from Oracle made it look easy. They have light bars in if anyone is interested. I would call them to order and make sure they are still in stock. Cheers!
 
Looking good thanks for sharing!
Thanks for the awesome product!

As an fyi in case it wasn’t intentional,I tried to tag you guys as the “product” on instagram but it wouldn’t let me.
 
Is that QTP cut out set up on your exhaust? Sounds mean!

GTHaus. It’s night & day difference when I swap it from open to close mode. I’m probably going to put sound deadening throughout my cab. The closed mode is barely noticeable in the cabin, but you can definitely hear it in open mode. Also, crazy, but it made a ~40whp difference in open mode versus closed mode.
 
Waited for the temp to cool down and during the evening hours installed Yakima Lock n Load flat rack and the Hi-Lift attachment to the Beast.

Overland build is coming along. Next a spot for recovery boards and accessories.

IMG_1858.webp
 
I swapped my grey skid plate out for the mopar black front skid.
 

Attachments

  • C35D34E6-06BD-4556-841E-B81FE0C41F9F.webp
    C35D34E6-06BD-4556-841E-B81FE0C41F9F.webp
    89.4 KB · Views: 231
  • D97E64B4-8E6F-4822-8D8C-2C67028BFCCB.webp
    D97E64B4-8E6F-4822-8D8C-2C67028BFCCB.webp
    208.1 KB · Views: 223
How hard?
How much?
Where?
Looks bad ass!
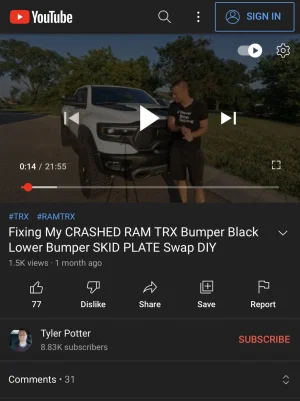
It was a lot of hardware to remove once I got the front bumper off. I located a dealership within 20 miles of me that had the front skid in stock for the ram rebel night edition, which perfectly fits this. They wanted $380 for the part. I did the work in my garage and it took me close to 3 hours to complete. I used a long breaker bar with a 18mm socket to get to the hard to reach nut on each side of the bumper that everyone complained about. After that, it really wasn’t all that bad to do. I learned using the picture of the video posted from YouTube to work through it. Saved a lot vs what the dealer wanted.

 

Attachments

  • 7484D4E5-CDAA-436F-BF52-ED76BDA96D39.webp
    7484D4E5-CDAA-436F-BF52-ED76BDA96D39.webp
    94 KB · Views: 62
It was a lot of hardware to remove once I got the front bumper off. I located a dealership within 20 miles of me that had the front skid in stock for the ram rebel night edition, which perfectly fits this. They wanted $380 for the part. I did the work in my garage and it took me close to 3 hours to complete. I used a long breaker bar with a 18mm socket to get to the hard to reach nut on each side of the bumper that everyone complained about. After that, it really wasn’t all that bad to do. I learned using the picture of the video posted from YouTube to work through it. Saved a lot vs what the dealer wanted.

Excellent detail and worth it as it transforms the front end and not a bad price considering the overhaul.
Thanks for those details!
 
It was a lot of hardware to remove once I got the front bumper off. I located a dealership within 20 miles of me that had the front skid in stock for the ram rebel night edition, which perfectly fits this. They wanted $380 for the part. I did the work in my garage and it took me close to 3 hours to complete. I used a long breaker bar with a 18mm socket to get to the hard to reach nut on each side of the bumper that everyone complained about. After that, it really wasn’t all that bad to do. I learned using the picture of the video posted from YouTube to work through it. Saved a lot vs what the dealer wanted.
FREAKIN' POTTER!!! ANOTHER WIN!
 

TRX Forum Favs 👍

Back
Top