You are using an out of date browser. It may not display this or other websites correctly.
You should upgrade or use an alternative browser.
You should upgrade or use an alternative browser.
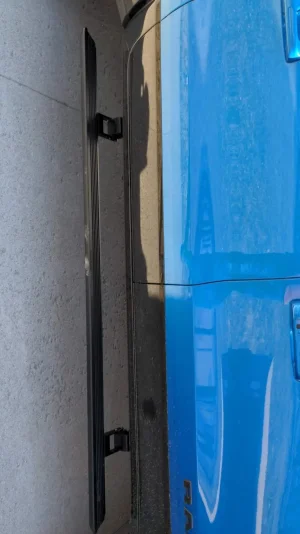
Installing Mopar Power Steps. Tips and Clarifications. (82215287AD)
- Thread starter HellcatTruck
- Start date
Honestly. No. Did you by chance lift them, when installing by the middle bar vs. The step? That is the only thing I can think of unless they were damaged in shipping.Does anyone know why the boards that were installed will not deploy /travel completely. Mine bind half way out or if they are out only close half way?
No to a question about the middle bar. They both do it. It is like the motor only turns 1/4 the way. The dealership states they want to enable the option code and it will work but I call BS as many people have not had to enable anything.
Did those who install themselves plug them in and connect to battery with the doors open or closed? Would that matter as I now have tried both.
Did those who install themselves plug them in and connect to battery with the doors open or closed? Would that matter as I now have tried both.
I dont have the option enabled in uconnect and mine work just fine. I put the fuse in with one board unplugged and one plugged in by mistake. The only thing that happend is only the side that was plugged in worked. When I plugged in the other side, opened and closed the door one time and it worked fine.No to a question about the middle bar. They both do it. It is like the motor only turns 1/4 the way. The dealership states they want to enable the option code and it will work but I call BS as many people have not had to enable anything.
Did those who install themselves plug them in and connect to battery with the doors open or closed? Would that matter as I now have tried both.
Something sounds like yours got damaged in shipping. You could try to kill battery power with them closed, wait 20 minutes (as others have recommended for FCA electrical issues), and then see.
Sorry yours aren't working correctly.
Could you maybe post or send me a picture where the wires go in the wheel wells? Not really seeing where they would go just looking under the hood.Just installed the Mopar power steps. Very pleased but thought I would share a few tips to avoid time sucks that I fell victim to.
Time savings #1. You do NOT need to remove the wheels and fender wells on this truck as the instructions suggest. I didn't remove the wheels but I did loosen all the screws on one fender well. Waste of 30 mins or so...
The wiring is a 2 part harness.
The first part (largest harness) is snaked through the firewall gromet on the drivers side. The grommet must be sliced on the border to fit the wires through. I removed the 2 screws at the bottom of the driver's side dash and pulled out the the remaing clips (pull straight out.. standard automotive clips). I used a cut coat hanger. Fished it through the sliced grommet from the inside to the outside (under the hood). A little 3M electrical tape on the side of the largest harness with the spades (not plugs) and it attached to the coat hanger and pulled right through (from outside to inside).
The other side of the largest harness (now under the hood) has three segments. One is for power. You are on the side of the battery so run it to the power distribution block in front of the battery. Instructions are not bad on this part. Don't connect it to the lug at this time. The other two pieces have plugs on them. The longer one goes to the passenger side. There is a wire channel up top (instructions show it). Use flatblade screwdriver to remove the top piece of each clip. Then do the second piece of each clip. The first piece is a pin that expands the second piece. Once removed the passenger side cable can be routed by tucking it up into the channel.
Route the driver side down the wheel well. You can push on them from the back side (looking from under the hood to flex them and keep the wire out of the hot zone. They are just plastic and will bend back as soon as you push them from the other side.
Do the same for the passenger side.
Now on the inside. The piece of the harness you snaked through the firewall has spades. They provide an automotive plug (gray) for you to plug these into.
TIP: be very carefully to plug them in correctly they are a nightmare to remove once they click into place. Check and double check before you snap.
Some of these spades also go into the black (smaller harness).
TIP: for the gray harness, I'm either color blind or their color abbreviations don't make sense to me. The BN/GN is brown and green, great. GN is green, great. Then you are left with Brown and Black and Brown. By process of elimination I plugged Brown into BG and the brown and black into BN/BG... it worked.
Once you have the spades hooked up. Plug both into the module they provide. Black is on left and gray is on right if you are looking at the top of the module and the ports are pointed at you.
The mounting location for the module was not clear for me. It is under the dash (driver side) to the left of the brake pedal. You will see a flat piece of sound deadening material. Use the 3 push clips provided to mount the module.
The only remaining things to do with regard to wiring are:
The small clip coming out of the black harness can go into any open slot on the factory module located in driverside kick panel. Instructions do a good job visually locating this.
The ground wire (with ring spade) goes on grounding spade in kick panel as well.
Plug in your boards as soon as they are mounted.
To mount the boards, motors always go forward. Lift them by the step, not the cross bar (sticker on crossbar tells you this right out of the box).
Slide them on existing bolts and use 6 provided nuts (either side to secure).
Now connect the power to the distribution block that you ran previously under the hood but didn't connect.
Wire tie everything, install clips, put back screws in dash.
Enjoy your easy climb into your beast. Return home, grab your favorite glass and tune into Dram of the Day with @soulsea.
Took me 2 hours. With tips I learned I think you can do it in 1.5 hours.
They just tuck up between the plastic wheel well and the metal. I should be able to send some tomorrow.Could you maybe post or send me a picture where the wires go in the wheel wells? Not really seeing where they would go just looking under the hood.
- Joined
- Jun 3, 2021
- Messages
- 27
- Gallery
- 3
- Reaction score
- 51
- Location
- Huntington, NY
- Current Ride
- 2021 Ram 1500 TRX
LMFAO! I just got my TRX two days ago... My wife in true woman fashion gets in and looks at me "Baby, are you gonna get those step thingys?"I had no option. Wife is 5'2". She would have had to pole vault in without them.
LMFAO! I just got my TRX two days ago... My wife in true woman fashion gets in and looks at me "Baby, are you gonna get those step thingys?stay
stay strong, don’t cave in to the dark side.
- Joined
- Jun 8, 2021
- Messages
- 832
- Gallery
- 96
- Reaction score
- 876
- Location
- Austin, TX
- Current Ride
- 2021 Ram TRX
- Current Ride #2
- 2017 Corvette Stingray
My wife is 5’1. I bought her a pole vault and a trampoline today; I’m all about options when it comes to my wife.
After purchase the wife said no on accessories for a while. She's the one who wanted the running boards. I did upgrade to power ones. They look and work great. Now if I can get her to say I need everything else on my list. :^)
- Joined
- Aug 16, 2023
- Messages
- 26
- Gallery
- 5
- Reaction score
- 15
- Location
- CALIFORNIA
- Current Ride
- 2021 MERCEDES CLS AMG
LOOKS LIKE A LOT OF WORK TO ME LOL
Mounting the boards are super easy. It is the wiring that takes the time. Even that is not difficult. It is very straightforward. Plugs all in, no cutting or splicing. The time really comes down to how anal you are with routing wires. I chose to remove the wheel wells from the front just to make the wiring easily accessible and I could be as neat and anal with how I routed them.LOOKS LIKE A LOT OF WORK TO ME LOL
TRX Forum Favs 👍


TRX Forum Images


TRX Forum Images
Latest Discussions...
-

-
-

-
 Meraki Autoworks 10 Year Anniversary Sale! 10% Off Brands!
- Latest: MERAKI AUTOWORKS
-
RAM-TRX Vendors