Horn relocate and/or reinforce horn wiring?

I own a lot of guns and carry from time to time depending on where I am...Zero chance Im pulling a gun on 2 tweakers trying to steal my sub...aint worth it...take the fucking sub...sounds like it was years ago tho...so I get it...today? Nope...Id shoot a Chinese spy balloon out of the sky tho ;-)
I own a lot of guns too, but I don’t announce it.
Ah, shit…
I used to own a lot of guns, but they all sank in a tragic boating accident.
What are guns🤣
 
I like peanut butter
 
But two physical horn snails, correct? At least mine looks to have both a low and high horn (2 horns)
Yes. It’s two separate snails to make the dual notes. I thought you were asking if there was a second (separate) horn.
 
Yes. It’s two separate snails to make the dual notes. I thought you were asking if there was a second (separate) horn.
Ah sorry - no how many actual snails. I ask as some 'relocation pics' only showed one of the two snails. Maybe just bad angles.
 
I just relocated the horn today!

Probably I’ll try to find another better place to put it in but for now it’s okay.

I didn’t remove the grill, I was able to remove the horn sliding it to the left side of the radiator!
6CF23CC9-9E66-4879-B536-992607C4BB56.jpeg
 

Attachments

  • FE5EF97D-D31D-4E47-B703-548ABA688158.jpeg
    FE5EF97D-D31D-4E47-B703-548ABA688158.jpeg
    499.3 KB · Views: 251
  • 69200B9D-960E-4284-B0DC-ECD0C6CA7DC4.jpeg
    69200B9D-960E-4284-B0DC-ECD0C6CA7DC4.jpeg
    379.1 KB · Views: 248
  • DDCE1AEF-669A-4713-BC73-C234762268EA.jpeg
    DDCE1AEF-669A-4713-BC73-C234762268EA.jpeg
    424.8 KB · Views: 269
  • 283EAC71-5027-4BE5-AF40-CBA1467A1FF4.jpeg
    283EAC71-5027-4BE5-AF40-CBA1467A1FF4.jpeg
    392.1 KB · Views: 272
I just relocated the horn today!

Probably I’ll try to find another better place to put it in but for now it’s okay.

I didn’t remove the grill, I was able to remove the horn sliding it to the left side of the radiator!View attachment 88223
Nice! Any chance you'd be willing to do a quick write up of the steps you followed? Seems like the hardest part is getting the horn disconnected, but any kind of a step by step instruction would be super helpful for the community on this forum.....several of us wanting to do this horn relocate. Regardless, thanks for posting the pics and proving it can be done DIY!
 
Nice! Any chance you'd be willing to do a quick write up of the steps you followed? Seems like the hardest part is getting the horn disconnected, but any kind of a step by step instruction would be super helpful for the community on this forum.....several of us wanting to do this horn relocate. Regardless, thanks for posting the pics and proving it can be done DIY!
+1 for a step-by-step!

Looks like a great place! Did you have to extend the loom?
 
thats something i and a few others are looking into, if you remove it completely the threaded rod falls out of line inside the door and potentially interferes with the window and you need to pull the door panel off to re-attach, the one option we are thinking is to cut the knobs short enough to stay within the door panel yet flush or slightly below so they cant be pried up
I am getting my truck PPF and took a look behind the front passenger door panel. I unscrewed the exposed silver lock cylinder and there does not seem to be any interference with the window. The black plastic cylinder snaps into the white plastic mold, keeping the cable from falling out. It locked/unlocked without issue. I will try to take a look at the rear doors but I am assuming it will be the same setup.
E3661953-8338-46C4-8D35-427378146210.jpeg
 
I am thinking of taking the $25 kill switch that I just ordered and running the power down with the horn wiring. That way if they cut the horn then they also cut the kill switch and the truck cannot be started.
 
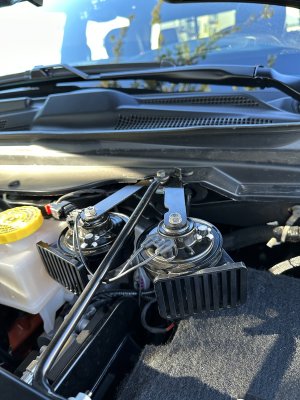
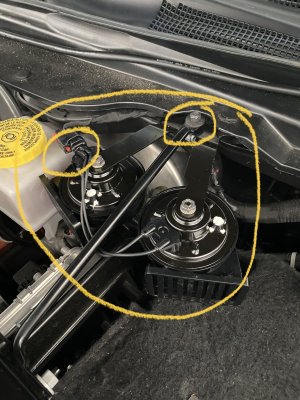
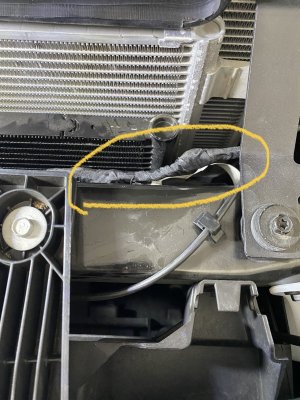
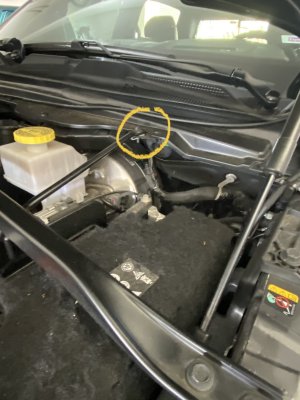
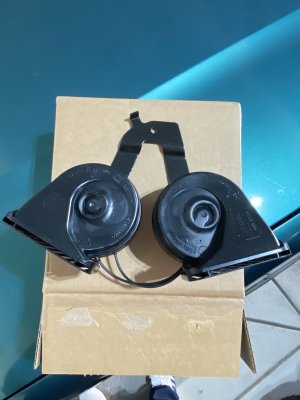
Apparently it is very easy for thieves to disconnect our factory horns before breaking into our beasts, and lots of posts about it. Has anybody figured out how/where to relocate the horn so it can't be fished/disconnected from the front? I was also thinking about using some kind of braided stainless steel sleeving to cover the exposed horn wires and solder/strengthen the connection points. Any input and/or pics would be appreciated! I have a Ravelco being installed tomorrow, but I'd like to take some extra steps to secure my pride and joy. Thanks all!
To make it harder before you decide on another solution, it is actually very simple to relocate the horn. Open the hood and look below the hood latch. You will be able to undo the bolt(s) that is holding the horn frame onto that brace. Undo it and take out the horn. Then, peel back the wiring to gain access to the wires and cut them, extend them with more wire enough to go back to the windshield and properly secure it. I relocated the whole horn assembly to the space between the battery and the windshield on the driver side (2021 RAM 1500 Limited Longhorn). Make sure to tuck and hide the wiring with all the other wires going back to the fuse box and then just continue up to the place you will sit the horn in. Be careful not to pinch the wires anywhere or have it too loose that allows the horn to move or short out anywhere on the battery or body.

This should be done by the dealer on every single RAM and Dodge sold for FREE. It is ridiculous that this has gone on for so long and without Stellantis taking responsibility/.
 
thats something i and a few others are looking into, if you remove it completely the threaded rod falls out of line inside the door and potentially interferes with the window and you need to pull the door panel off to re-attach, the one option we are thinking is to cut the knobs short enough to stay within the door panel yet flush or slightly below so they cant be pried up

You don't need to cut them off, just unscrew them from the lock mechanism, then install a 3/8" plastic plug in the hole. I bought them at Ace Hardware for 40¢.

20220725_194933.jpg
 
I just relocated the horn today!

Probably I’ll try to find another better place to put it in but for now it’s okay.

I didn’t remove the grill, I was able to remove the horn sliding it to the left side of the radiator!View attachment 88223
How’s the horn sound / noise level?
 
I just relocated the horn today!

Probably I’ll try to find another better place to put it in but for now it’s okay.

I didn’t remove the grill, I was able to remove the horn sliding it to the left side of the radiator!View attachment 88223
Decided to do this weekend what @TRX-BR4Z1L did - relocated the horn. Easy - but since the existing horn is such at B!thc to get out, I simply bought a second… may or may not confuse those who are interested in pulling a horn wire that is obviously not there - or they will break the window anyway and the relocated horn will go off….

Note on the new horn bracket, you may have to straighten the notch that was designed to hold it in place from moving in its original position (front of the radiator).

Anyway provided a few pics of what I did as well. The yellow circles are more for attention to where wires were disconnected, spliced, run, or new horn fastened, etc.

Not difficult at all overall.

Mark
 

Attachments

  • IMG_9193.jpeg
    IMG_9193.jpeg
    392.7 KB · Views: 120
  • IMG_9194.jpeg
    IMG_9194.jpeg
    218.8 KB · Views: 114
  • IMG_9196.jpeg
    IMG_9196.jpeg
    369.1 KB · Views: 110
  • IMG_9197.jpeg
    IMG_9197.jpeg
    396.2 KB · Views: 112
  • IMG_9198.jpeg
    IMG_9198.jpeg
    368.8 KB · Views: 110
  • IMG_9199.jpeg
    IMG_9199.jpeg
    401.5 KB · Views: 108
  • IMG_9192.jpeg
    IMG_9192.jpeg
    230.6 KB · Views: 108
  • IMG_9191.jpeg
    IMG_9191.jpeg
    270.2 KB · Views: 110
  • IMG_9187.jpeg
    IMG_9187.jpeg
    295.8 KB · Views: 112
  • IMG_9185.jpeg
    IMG_9185.jpeg
    267.4 KB · Views: 111
  • IMG_9184.jpeg
    IMG_9184.jpeg
    288.9 KB · Views: 105
  • IMG_9183.jpeg
    IMG_9183.jpeg
    221.6 KB · Views: 106
  • IMG_9182.jpeg
    IMG_9182.jpeg
    184.8 KB · Views: 101
  • IMG_9181.jpeg
    IMG_9181.jpeg
    304.9 KB · Views: 101
  • IMG_9200.jpeg
    IMG_9200.jpeg
    319.8 KB · Views: 122
Back
Top