“Plug and play” anti-theft kill switch

Most thieves are lazy and stupid. If they weren’t, they wouldn’t be thieves.

Plus, now the Tazer is going to offer its own anti-theft feature too. You use that along with this kill switch, the truck is (practically) unstealable. With remote start intact and without having to pay anyone to install anything, or cut any wires.
I wasn’t interested in a Tazer until now. This sounds interesting.
 
I wasn’t interested in a Tazer until now. This sounds interesting.
Yeah, should be really cool. I already have the Tazer so it’s just another bonus to me. I only need to pick up the @BrawlerFab Tazer guard thing so they can’t just unplug and defeat it.
 
Just another way to get the job done. I’ve seen people do kill switches on the fuel pump, e-brake, etc. This one I cooked up uses an off the shelf harness to interrupt power to the starter button. This allows retention of the remote start, and no wires to cut. Just about everything can be defeated but I figured this would at least add another layer of “fuck you” to the key-cloners. And 100% reversible to stock with no footprint at all. Primarily intend to use it at hotels and when I’m on the water with my boat. I’d be really pissed to come back to no truck and no trailer.

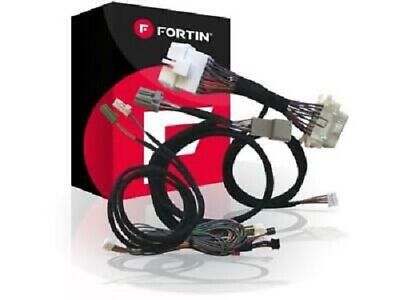
Anyway, this is the harness:


Guessing it’s for some kind of remote start system but I cut 90% of it off anyway.

View attachment 42117
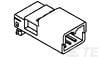
Peeling back the onion, these 6 pin connectors are what we’re after:
View attachment 42118
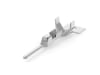
Note that only 4 pins are populated in the truck’s harness, so I de-pinned the blue and orange wires. Dunno what they do, but they ain’t there in the TRX. In this aftermarket harness, there are also long wires teed into the blue, white with green stripe, and black wires. I got rid of the tees and soldered just the two ends back to each other as shown. Note that the one wire has a green stripe on the male plug and red stripe on the female, but they do go together and are in the same pin position.
View attachment 42119
I then extended the red wire leads to go out to a kill switch using the excess wire from this kit.View attachment 42123
Next up is the truck-side of the work. I pulled the knee buster down, and reached up to push the starter switch out of it’s hole.View attachment 42124
There are two tabs on top and one on the bottom.
View attachment 42125View attachment 42126
From there it was a matter of installing my tee harness:
View attachment 42135
I taped over the connector to make it a little less apparent and harder to disassemble. Anyone who’s dealt with Tesa tape knows it’s a bitch to unpeel. Obviously the way to defeat it is to unplug the tee harness and plug the factory harness directly back into the switch. To avoid that possibility, you can hardwire without the tee harness. That would be more secure, but I just didn’t want cut wires. I never ever do, and won’t start now. You do what you want.
View attachment 42136
Last step is the kill switch. Any simple SPST on/off switch works. I used a high quality Carling marine switch because I just didn’t want problems. I soldered my wires right to switch and heat shrunk and taped over them.

You can put the switch anywhere you want. I found a pretty neat location. Very difficult to find while being comically easy to reach. The steering column has a leather thing around it and a hole where the tilt adjuster lever passes through. I pulled the headlight switch (just pull!), and mounted the kill switch to a brace that is facing the adjuster lever. I have the switch positioned so I can reach in the hole in the leather and flip it. The switch does not restrict the adjustment lever movement and is totally invisible. Switch is on the metal bracket with the slot running down it.
View attachment 42139
This is the view from below. Yes, you can kinda see it, but it’s way up there and not obvious. You wouldn’t be likely to find it in a rush, and you wouldn’t be able to feel it or reach it from below. Good enough for me.View attachment 42140
Now, I did highlight it’s weaknesses, this is not the perfect solution. I am aware. I just figure for $70 this is way better than nothing. It is easy to install with no factory wires to cut and could supplement other security measures such as my S&W 500 mag. Or maybe a dummy OBD2 port, wheel club, etc. I’m not super paranoid, just wanted to do a little something.
Thank yoi sir very helpful.
 
Does anyone have a line on the male and female connectors used for the start button? I can't find info on them anywhere. If I have to drop ~$70 to get them, I will, but I'd rather not since my plan is to re-pin and extend the harness. I literally just want the plugs. The rest would be throw-away for me.
 
Does anyone have a line on the male and female connectors used for the start button? I can't find info on them anywhere. If I have to drop ~$70 to get them, I will, but I'd rather not since my plan is to re-pin and extend the harness. I literally just want the plugs. The rest would be throw-away for me.
Female connector:

Male connector:

And you’ll also need (4) of each of these (if you’re making an extension harness):

Female connector terminals:

Male connector terminals:
 
Female connector:

Male connector:

And you’ll also need (4) of each of these (if you’re making an extension harness):

Female connector terminals:

Male connector terminals:
Thank you, sir! I owe you a beer.
 
Female connector:

Male connector:

And you’ll also need (4) of each of these (if you’re making an extension harness):

Female connector terminals:

Male connector terminals:
@Eighty , how did you ID these connectors? Is there a resource on the web with this info? Were you able to extract it from some factory wiring diagram? Are you omnipotent?
 
@Eighty , how did you ID these connectors? Is there a resource on the web with this info? Were you able to extract it from some factory wiring diagram? Are you omnipotent?
I’ll go with omnipotent.

Actually, I got the info from @Jimmy07. When it comes to the electronics in our trucks, he is basically omnipotent.
 
Can somebody talk details about mounting the switch on that slider pictured in the original post? How do you get your fingers in there to flip it? Do you cut the fabric on the "leather" flap that surrounds the steering wheel? If not, mine only has a small hole at the very end, and I can't figure out how I'm going to activate the switch if I mount it in there. Are you guys cutting the flap where the steering wheel adjusting lever goes through it?
 
Can somebody talk details about mounting the switch on that slider pictured in the original post? How do you get your fingers in there to flip it? Do you cut the fabric on the "leather" flap that surrounds the steering wheel? If not, mine only has a small hole at the very end, and I can't figure out how I'm going to activate the switch if I mount it in there. Are you guys cutting the flap where the steering wheel adjusting lever goes through it?
Nope, no need to cut the fabric. If you place the switch just right it’s very easy to slide in under the tilt lever with your index finger and flip it. Basically want the switch mounted vertically and as close as possible to the hole in the fabric (without interfering with the tilt lever movement). Some trial and error may be needed in the mock-up.

Just shot a quick little vid of how I usually operate it. If you flip the switch while you get in and out of the truck, you can use your right hand and it’s a little easier. But it works fine left handed while you sit there too.


I thought I’d only use the switch while traveling but I’ve been using it every day since I installed it, and it works great.
 
@OnTheReel Thanks for the work on this. Since your initial post, and thanks to @Jimmy07 (via @Eighty ), I've got all my bits here to build my version of this harness. Since my truck won't be here for a while, I'm planning to figure out my plan on my JL Wrangler first.
 
Nope, no need to cut the fabric. If you place the switch just right it’s very easy to slide in under the tilt lever with your index finger and flip it.
How did you fish it all the way across the steering column? Which trim part did you remove to place the switch?
 
How did you fish it all the way across the steering column? Which trim part did you remove to place the switch?
Take off the bottom trim piece that's held on by two screws. They have a 7mm head. There are 3 electrical connectors to unsnap. Leave the hood pop cable attached and lay the plastic piece down in the floorboard. Now look up in there with a flashlight. It will be obvious after you take a look.
 
Nope, no need to cut the fabric. If you place the switch just right it’s very easy to slide in under the tilt lever with your index finger and flip it. Basically want the switch mounted vertically and as close as possible to the hole in the fabric (without interfering with the tilt lever movement). Some trial and error may be needed in the mock-up.

Just shot a quick little vid of how I usually operate it. If you flip the switch while you get in and out of the truck, you can use your right hand and it’s a little easier. But it works fine left handed while you sit there too.


I thought I’d only use the switch while traveling but I’ve been using it every day since I installed it, and it works great.
Many thanks for the details. I will try again using that advice.
 
So, I'm an accountant and I'll likely mess something up if I do this myself. Does anyone want to build and sell these set-ups, so newbs like me can just plug it into the start button and route the kill switch somewhere hidden?
 
Back
Top